In this multi-part post, I will explain how I deployed my Active Directory lab.
I’m using VMware Workstation for the virtual machines, but you can also use VirtualBox. So, let’s begin.
First, you will need to download a Windows Server ISO. You can use the evaluation version of the latest Windows Server for 180 days. You can get it from here.
** Just in case, when creating the virtual machine with the server, sometimes you will get an error like this one:

To avoid this, when you create the virtual machine, select the “I will install the operating system later.” option.**

Next, we install Windows Server like a normal installation.
Once everything is up and running, we choose the ‘Add Roles and Features‘ option, and a wizard will appear to guide us through the configuration.

So now we select the “Role-based or feature-based installation“.

And we select the server from the pool. It might be a good idea to rename your computer to something more informative.

Following, the wizard will show us a list with several roles. We must select the “Active Directory Domain Services“.

In the following list, we leave it as it is and we press Next.

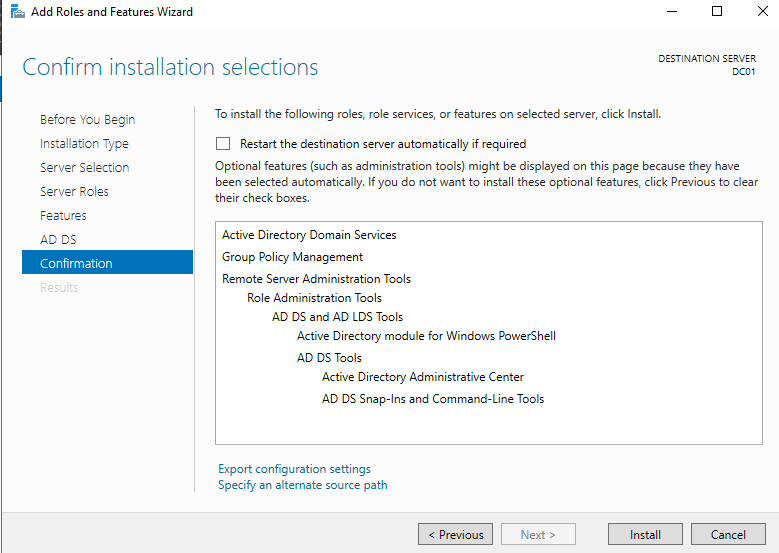
In the final step, we’ll get a summary of the roles and features to be installed, allowing us to confirm them before proceeding with the installation.

In the following article, we will create the domain forest and a user to manage it, as it’s a bad practice to do everything with the Administrator account.